This is a test site. Go to Better Hardware for purchases
Wire Balustrade Kits


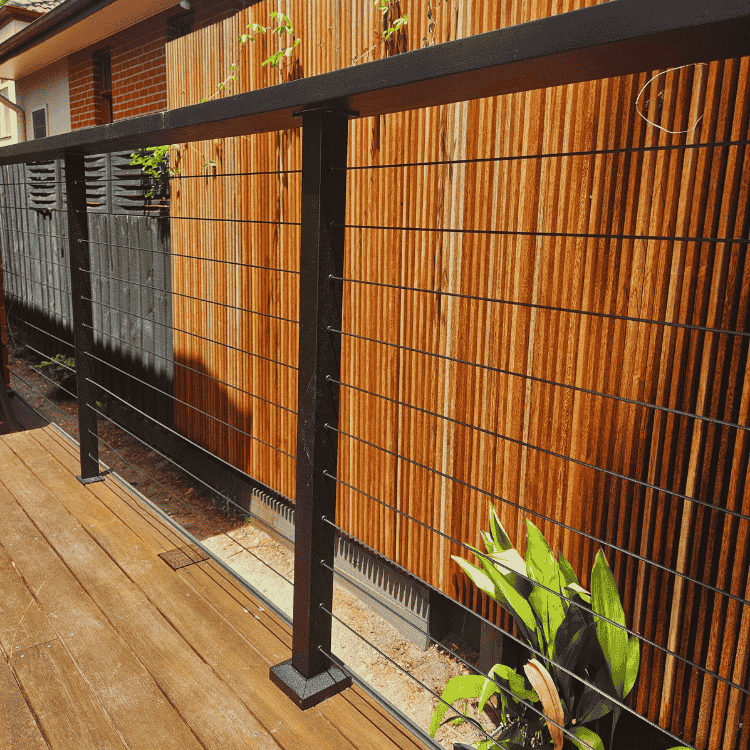
Choose from an extensive range of wire balustrade kits and systems to suit practically any application. Whether it's the most cost efficient or slimline available, for timber or metal posts or for flat sections or stairs - we've got you covered.
Check out our new How to install Wire Balustrade guide where we answer the most Frequently asked Questions and provide an overview on balustrade wire, fittings, regulations and most importantly how to choose the right system for you.
Popular Products


From $8.17
To $16.37


- Swaging System Mechanical Swaging Remove This Item
- Post Fixing Material Timber Remove This Item
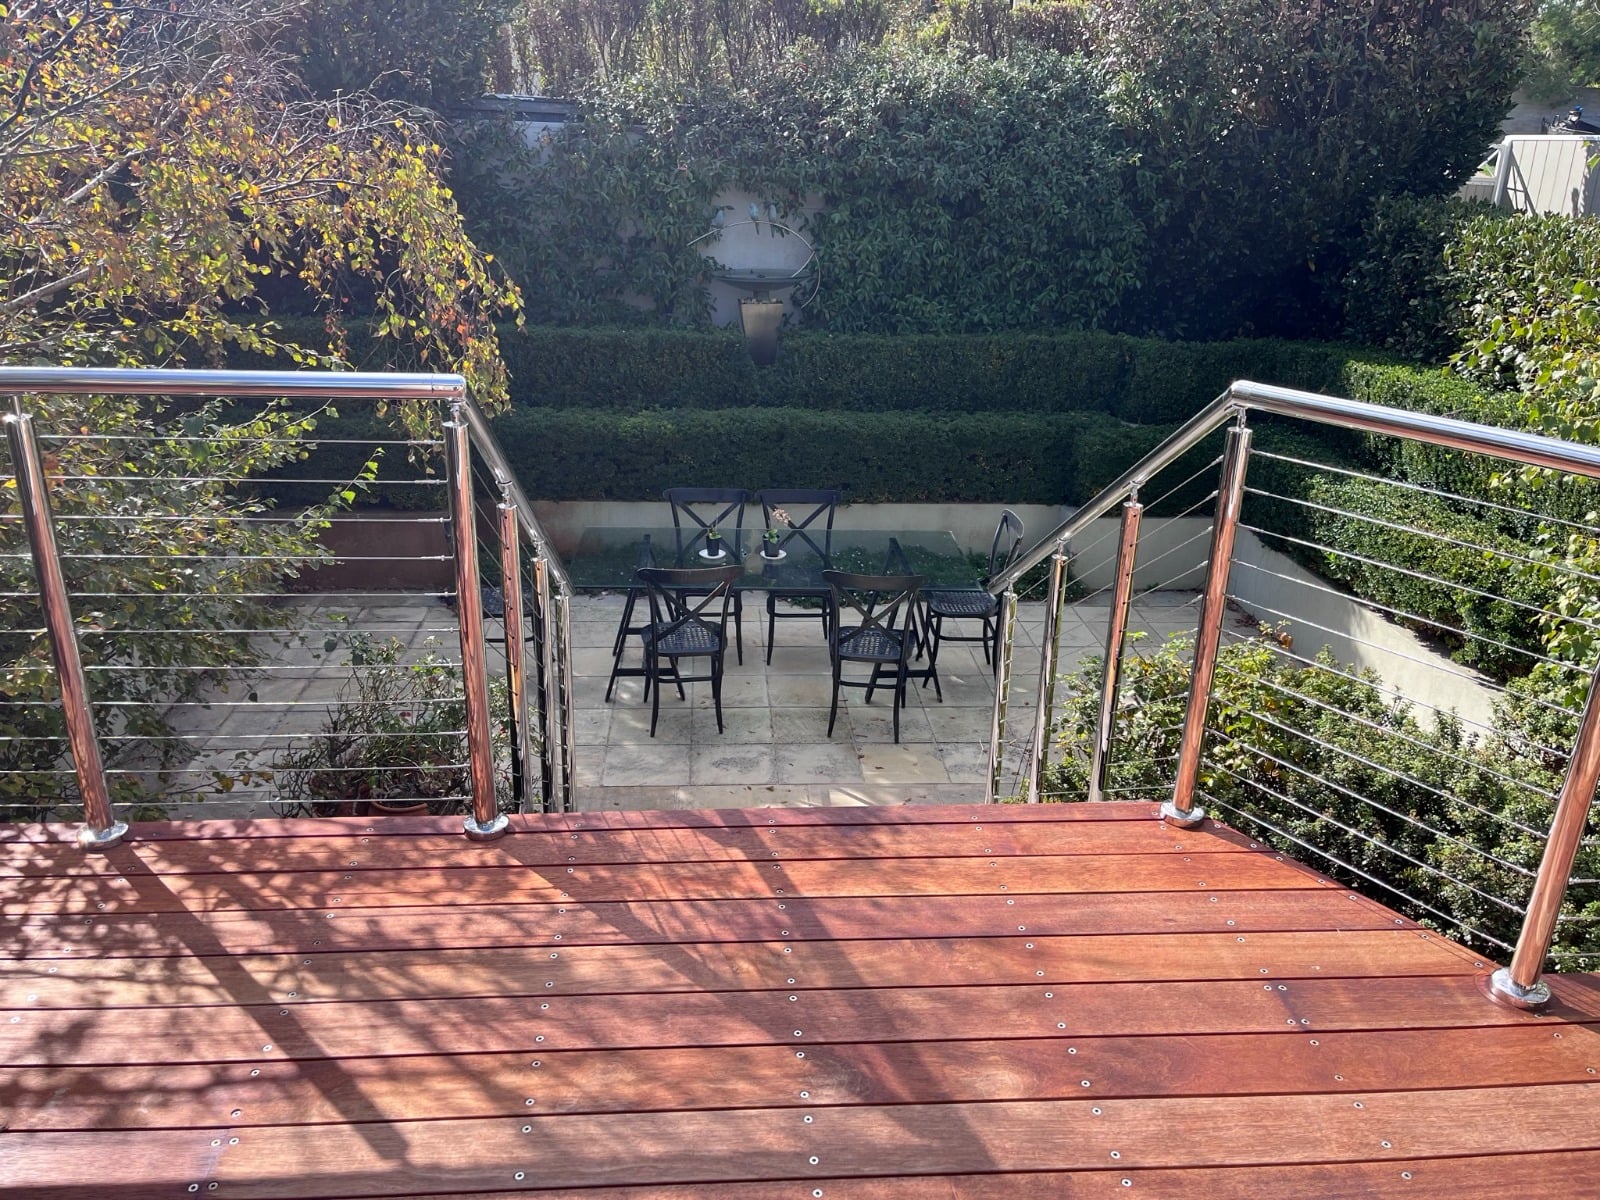
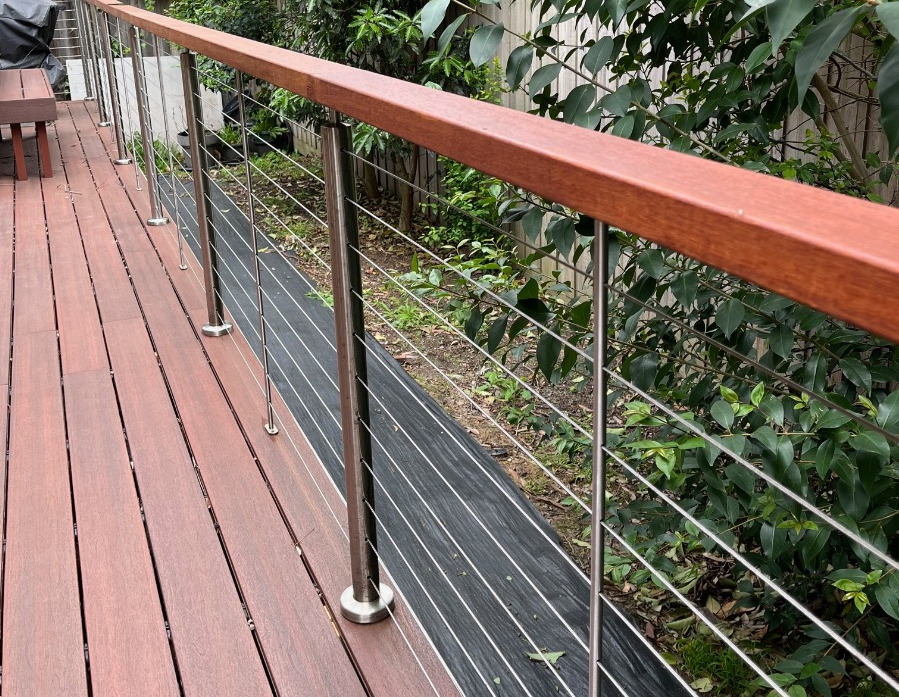
recent projects with posts & wire balustrade
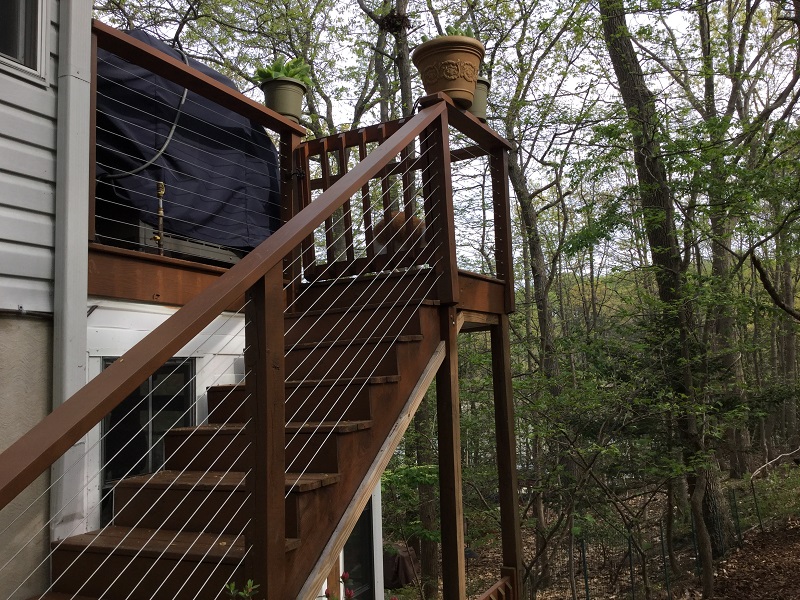
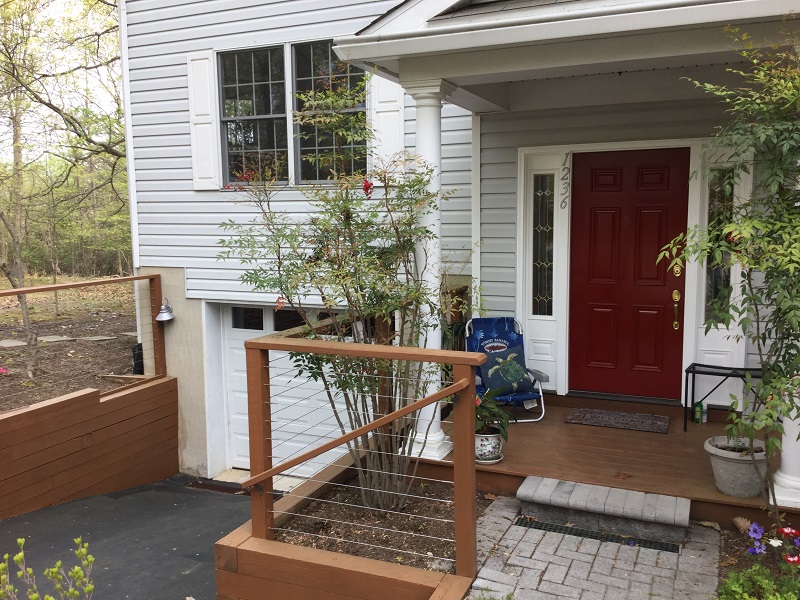


Projects Showcase


FAQ
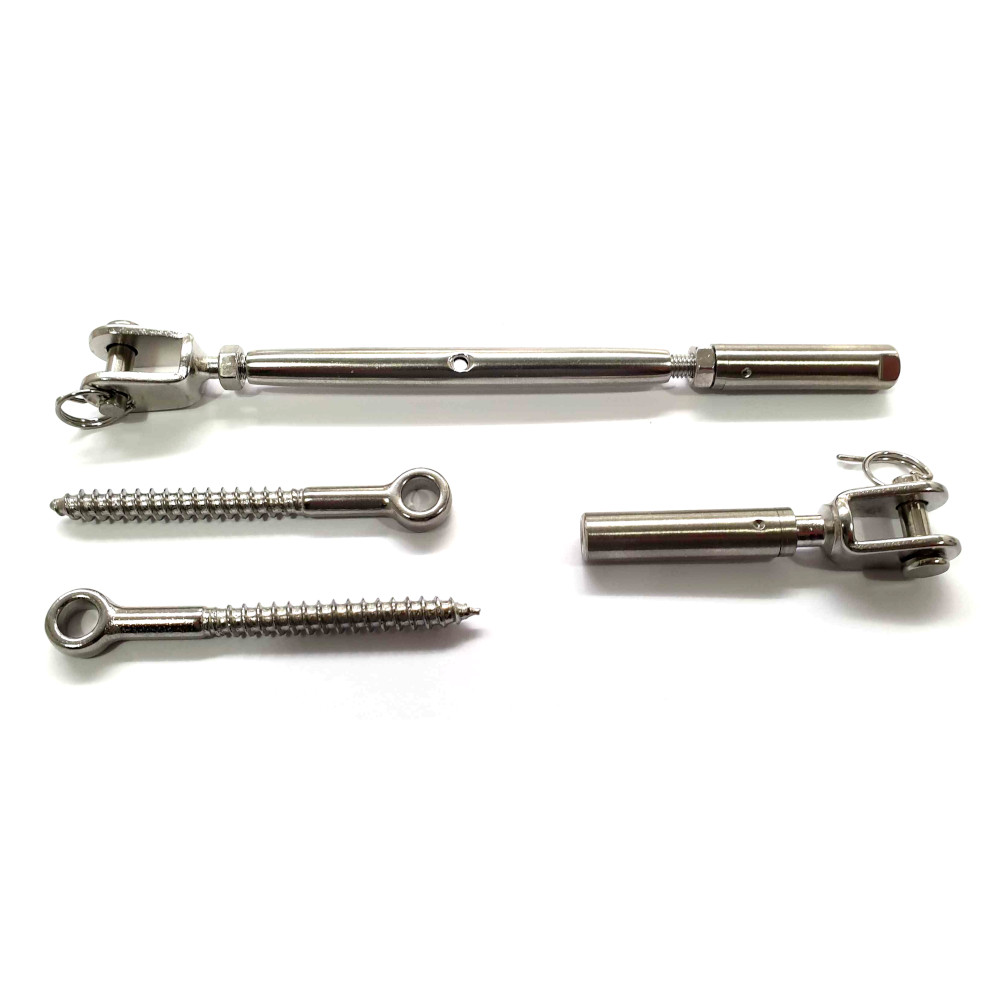
Swageless kits are DIY-friendly and assembled on-site. They don't require swaging which reduces the workload and doesn't require a swaging tool. These are typically more premium fittings and are available in a smaller range across styles and wire diameters.
Swaged systems are typically used in trade workflows with hydraulic swaging. They are typically cheaper than swageless systems, even factoring in tool costs for 11 or more runs on the project.
- Hydraulic Swaging offers a more streamined and easier to install approach. They are the go-to on most projects. They are trade and DIY friendly, very affordable and look great.
- Mechanical Swaging is typically more cost-effective and an older style that you've seen around a lot longer than Hydraulic Swaging. These are considered more difficult to install and less streamlined, but more budget friendly.
Typically yes, if you have not done this before you are unlikely to have the required tools for the job.
Check each Kit's product page for the tools required as it varies depending on the kit. You can check the Other items you might need section on the specific kit's product page for appropriate tools.
Make sure you check whether the system requires Hydraulic Swaging, Mechanical Swaging, or is a Swageless System:
- Hydraulic Swaged Systems require a hydraulic swaging tool.
Mechanical swaging tools do not deliver enough pressure to effectively swage the fittings onto the wire - allowing the wire to pull out! Heavier gauge kits (e.g. 4.0mm) require a Heavier Duty Tool that can deliver sufficient pressure to swage the fittings. - Mechanically Swaged Systems require at least a mechanical swaging tool. Heavier gauge kits (e.g. 4.0mm) require a Heavier Duty Tool that can deliver sufficient pressure to swage the fittings.
- Swageless setups typically require cutters and tensioning tools, but do not require a swaging tool.
There are also a mix of other installation tools you may need. Check the Kit's product page for more information.
Depends on the kit. Use the Filters to determine what kits are compatible with stairs/ramps.
You are looking for a pivoting mechanism that allows the system to angle to the required angle under the given conditions (there are sometimes limitations with this). See the stair and ramp wire balustrade full guide here.
We recommend starting your parts list with and checking the Kit's product page first! Wire Balustrade compatability is always driven from the Kits, rather than any particular wire or tool.
We show the compatible wire, tools and similar kits so you know what works!
Additionally, we make notes about incompatability between kits, tools and wires.
But, Yes! Share your parts list, post type and preferred Kit and we can help confirm if the parts are compatible with each other.
Please note we are unable to determine if what you buy is what you require for the project. This is a question for a builder, surveyor or other qualified professional who can be on site and assess your specific project's need. - We are a materials supplier only.
We also can't guarantee a product is the same as an existing one you have, or one you may acquire from a different supplier as there are variances between manufacturers and batches, even if they have the same name. If you have an existing component (e.g. swage fitting) from a supplier, it is best to ask them what tool is required as the recommendation can vary depending on the component.
Measure the distance between where you are fixing the wires from the faces of the post - This changes depending on the termination points of the particular kit. We refer to this as a Section. Don't cut out the intermediate posts that you are running the wire through for calculating how much wire you need! - The wire still runs through there!
Calculate the number of wires you are using per section. These are known as runs.
Multiple the number of sections by the number of runs for each section. (The number of runs may be different per section). E.g. 11 runs on horizontal sections; 10 runs on stair sections.
Sections x Runs = Total Meterage of Wire Required
e.g. 11 x 2135mm + 11 x 5454mm + 10 x 1310mm = 96,579mm or 96.579m
Termination Points
Inside-to-Inside Kits: Measure the distance between where you are fixing the wires into the inside faces of the post.
Inside-to-Outside Kits: Measure the distance between where you are fixing the wires into the inside face of the post and the outside face where you are fixing into. You measure the outside to account for the wire going into the post.
Make sure to measure the correct posts if they are different!
Outside-to-Outside Kits: Measure the distance between where you are fixing the wires into the outside faces of the posts where you are fixing into. You measure the outside to account for the wire (and fittings) going into the post.
Niche considerations:
Reel Capacity
If your runs are consistently long, you may need to consider if you can cut all the lengths you require from the lengths of reels purchased.
e.g. 13m x 11 runs = 143m
100m Reel = 13m x 7 runs = 91m
50m Reel = 13 x 3 runs = 39m; 4 x 13m = 52m
You would not have enough capacity in the reels to complete the project.
You would need to buy enough capacity across the reels which may warrant a large or additional reel.
Please note that different types of wire are often limited in different reel sizes, so it is best to check what reels are available for that specific wire when calculating capacity.